1. Construction Preparation: "Pre - battle Planning" for Solar Pile Driver
First, conduct site surveys to understand the geology (soil hardness, rock layers) and site environment (flatness, obstacles). Based on design drawings, customize a drilling plan for the solar pile driver—determine pile positions, depth, diameter, etc., adapting different processes for varying geological areas.
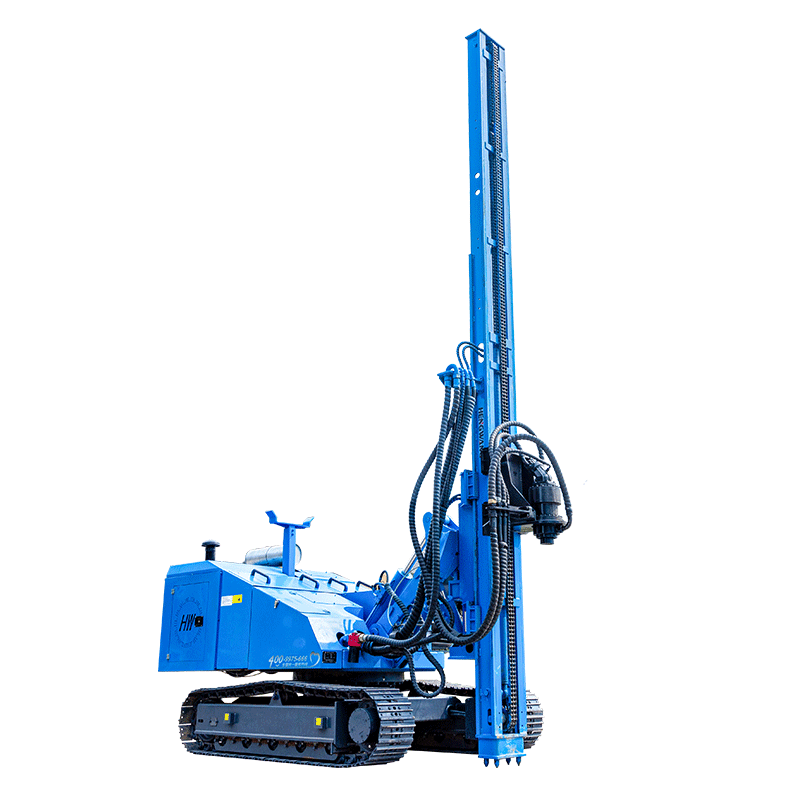
Prepare equipment and materials: Select the right solar pile driver (hydraulic/screw drill, suitable models for mountain solar projects), equip with surveying instruments (total station/GPS), drill bits (alloy bits for soft soil, silicon carbide bits for hard rock), as well as embedded parts, concrete, and safety supplies. Ensure personnel are trained to ready the solar pile driver for operation.
2. Positioning and Marking: "Precision Navigation" for Solar Pile Driver
Use professional equipment for positioning! Large power stations rely on total stations and GPS, while complex terrains (mountains/hills) integrate RTK and Aowei Maps to mark pile positions for the solar pile driver accurately. For small projects, use a level and tape measure to minimize positioning errors.
Markings should be visible: Circle pile positions with lime/paint and set auxiliary lines to define construction boundaries, so the solar pile driver knows "where to drill" upon arrival.
3. Drilling Operation: "Core Battlefield" of Solar Pile Driver
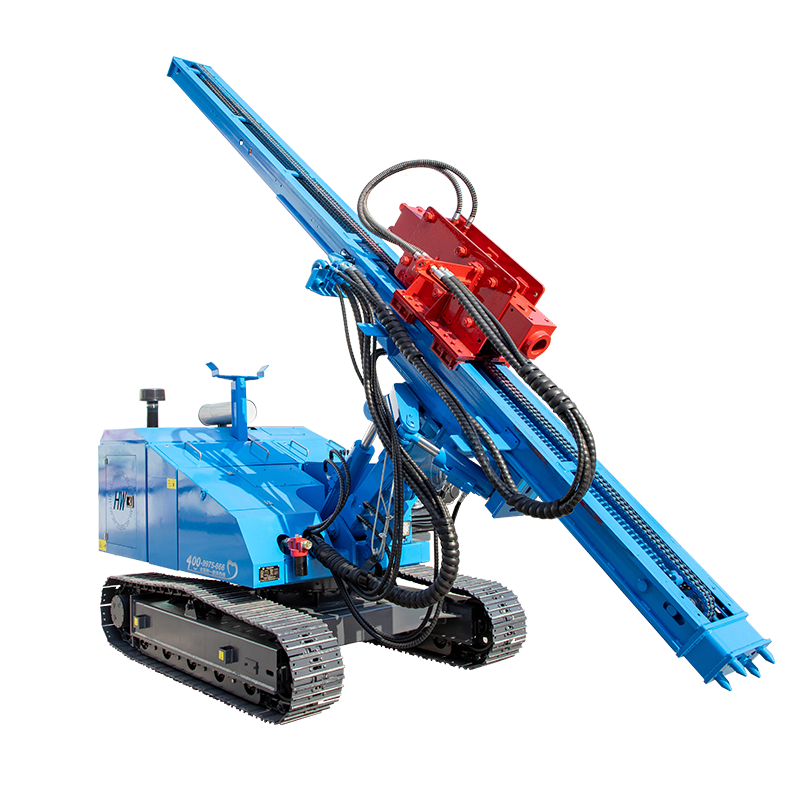
Choose drilling methods based on geology! Apply rotary drilling for soft soil, impact drilling for hard rock, and commonly use screw drilling for solar pile foundations (switch between 1m/2m models flexibly for different depths).
Debug the solar pile driver: Install the drill bit, adjust rotation speed/impact force, align with the marked point, and drill vertically. Slow down when encountering hard ground and use coolant timely to prevent overheating. Strictly control depth via equipment scales/marking rods, keeping errors within standards to ensure the solar pile driver creates "straight and deep" holes.
4. Hole Cleaning and Inspection: "Quality Check" After Solar Pile Driver Work
Don’t rush to leave after drilling! Clean small holes with vacuums/hairdryers; use "hole - cleaning tools" and mud circulation for large piles to remove debris, ensuring holes are spotless.
Inspection must be rigorous: Measure hole diameter with calipers, check depth/verticality with gauges. For unqualified holes, the solar pile driver must "rework" to avoid defects.
5. Follow - up Connection: "Relay Race" after Solar Pile Driver
6. Safety and Quality: "Shield" for Solar Pile Driver Operations
In safety: Assign dedicated operators for the solar pile driver, conduct regular maintenance, ensure personnel wear protective gear, and suspend work in high - altitude conditions or bad weather (wind/lightning) to prevent accidents.
In quality: Record and inspect each step from pile positioning to concrete pouring. Piles drilled by the solar pile driver must withstand long - term operation to guarantee power generation efficiency, making the solar power station stand firm and generate electricity reliably!
Mastering the construction process of the solar pile driver boosts power station setup efficiency instantly! Regardless of terrain or project scale, the solar pile driver can lay an efficient and reliable foundation. To advance your solar project smoothly, put this process into practice now!